• Home
  • Travel Stories
  • Travel Photos
  • Photography Tips
    • Lens
    • New Camera
    • Tips
  • About
  • Contact
  • Download

Tama Zoom

facebook google twitter tumblr instagram linkedin
When you are just blank, don’t have any idea to shoot with the new way, try the 6 composition of photography bellow :


1. Find the unusual Angle

Shooting object which is parallel with the eyes is pretty standard , easy and comfort, but the impact is the audience also feel so boring. Need the unusual view angle to get different photo from the the usual, we can call it X factor. If your camera have back monitor that can be articulation, simply just squat and direct the camera up or straight to the front and we can set the beautiful composition. If you use Digital SLR , sometimes you have to prone to get the unusual angle and set the composition in viewfinder. Curious? You should try this technique, you will get beautiful different photo.


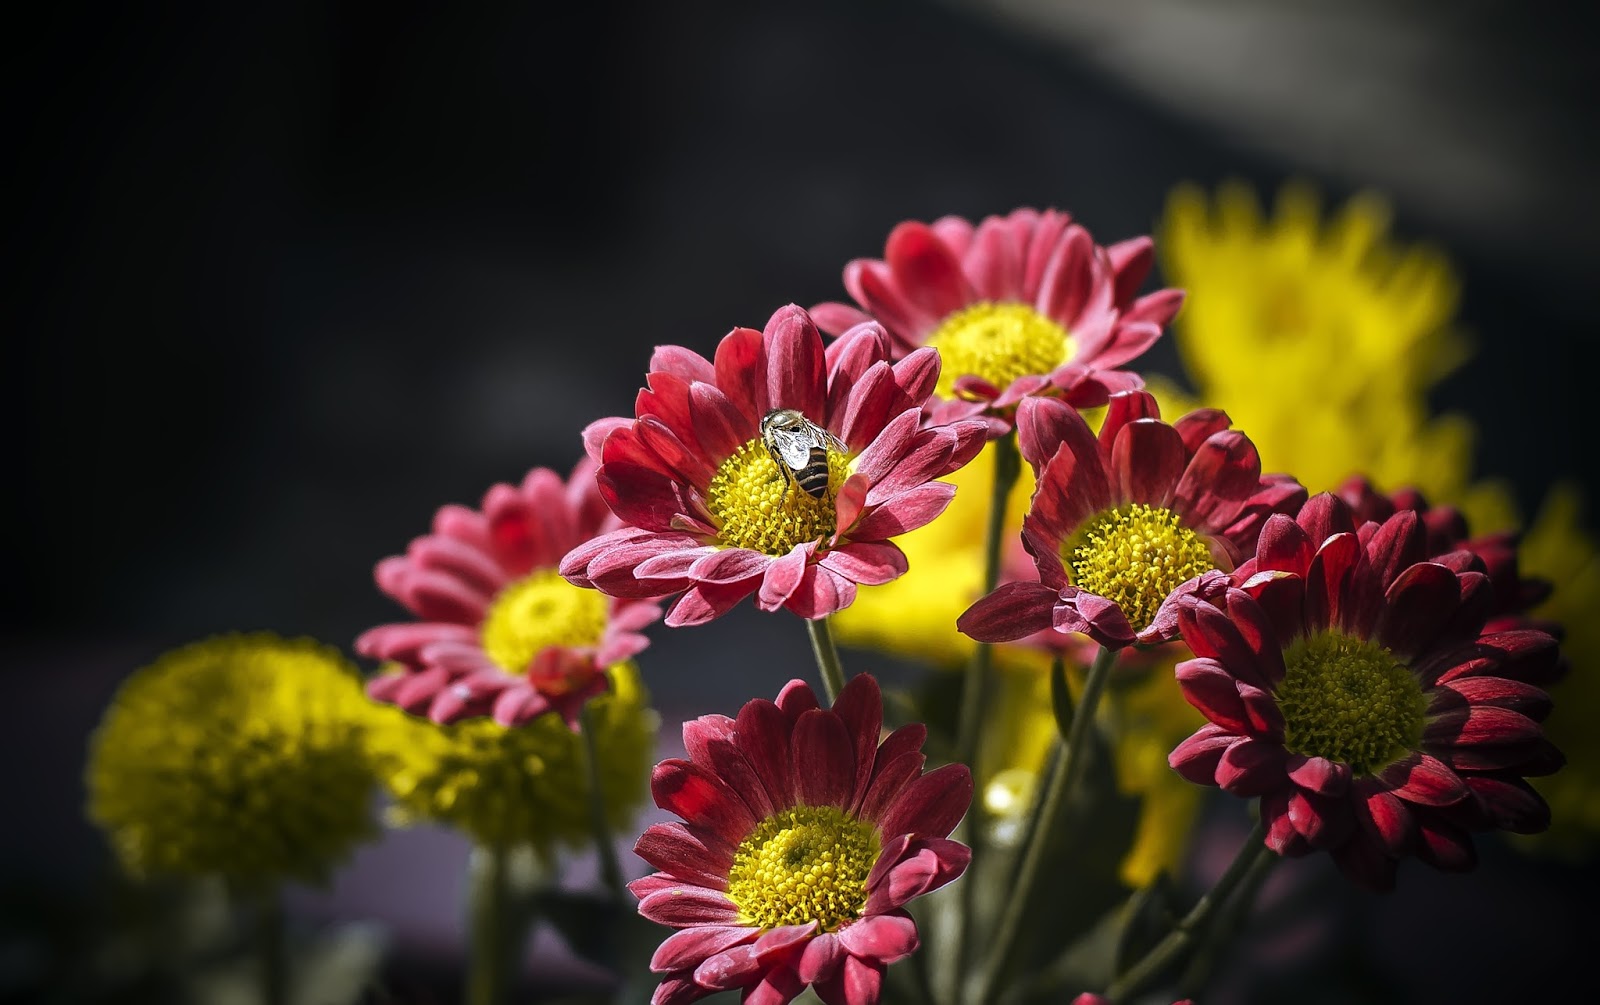
2. Play With Combination of Colors 

Try to play with combination of primary colors ( Red- Green-Blue) that show contrast colors : for example a photo subject which is dominated from green color , you’ve succeed to find other element in red so it would seen contrast in eyes. 


Try also the other contrast colors, for example blue and yellow and etc. The point is you can use the colors as the main interest, not the shape or position.


3. Find The Reflection

Reflection can make a photo that stand alone become more special and impressed with the reflection. The requirement is just one : You can find the clear and silent reflection, or if it’s not working just try with make the unique reflection.


4. Familiar with Convergent Lines

All right let’s we start from what the convergent is ? The convergent is “is towards a meeting point ; are converging “ . In Photography you can get the convergent lines with the wide lens , 10-22mm, 12-24mm, 16-35mm,17-40mm and etc, and the camera little bit tend to top . With the wide lens, The vertical line would seen diagonal and not parallel. This isn’t mistakes, but the blessing that yo can take as benefit for you, because the convergent lines create dramatic photograph that more attractive and unusual. Recognize the convergent lines and use it properly.


5. Rule of Thirds is not a must.

Rule of third is coll and tested very well, but there’s no law that control us to always use rule of third in all photographs. Try to ignore it, place the interesting points of photo i the center of frame.


6. Try the other aspect Ratio 

Most of photographs are produced suitable with the ratio of censor size, it means that most of photographs are produced in ratio 3:2 or 4:3. Then Instagram was come and make the ratio 1:1 become trend and it’s seen very cool. For that, try to shoot in 3:2 , 1:1 or 16:9. You can change in camera or try with crop in post processing.


Share
Tweet
Pin
Share
No komentar

Usually, the way to lock focus is with the half  press shutter button. But actually there’s one feature that  often to use by professional photographer , there is AF-ON button. Focus technique with this button is called “ back button focus” because it use the button at back, it’s not the shutter button in front. 

Understanding Back Button Focus.
Back button focus is the feature with current button in the back part of camera, usually marked by AF-ON or (*) button and also it’s pressed with the right thumb. If in the back part of your Digital SLR Camera there’s button with AF-ON  button, so you can use  this technique easily . But if there isn’t exist, don’t worry, yo still can do this technique with special setting in camera menu setting. 

What the advantages of using back button focus technique?
The main advantages of autofocus with AF-ON button is we don’t need to do the half press shutter button anymore. You just need to press the AF-ON button with the thumb,then autofocus start to lock the motionless object or do tracking when shoot moving object. If it was ok and you want to shoot, just full press the shutter button without release AF-ON button.

Back button focus is very useful when we use continuous autofocus mode or tracking moving object and when we recompose. When use the continuous mode with the back button focusing, we don’t need shutter button to lock the focus. If you often shoot  in continuous mode, of course you ever do when we want to lock the  focus but the fact is button focus was pressed then camera shoot accidentally.

Some cases where back button focus is very useful
There are some cases of photoshoots where  back button focus will very useful . Let’s figure out:
• When shoot little kids that always keep moving, or when shoot the sport activity. We can minimize the break times between half press shutter and when exposure. Just press AF-ON button with your thumb to lock the focus then take the exposure as fast as possible with your point finger.
• When you shoot people who’s posing for several times . You can shoot with quickly without choose the new focus dots.
• In situation when camera is confuse to choose the focus. For example when shoot the tiger behind the iron wire fence, sometimes camera confuse and choose the focus on fence , instead focus on tiger. With back button focus we can lock the focus on tiger then start to recompose.
• When we want the sharp photograph. With the half press shutter button to lock the focus, it wil so hard for camera to move front , so that the stability will decrease and photo will tend to blur. Back Button Technique can handle it.

How to use Back Button Focus in Canon Digital SLR
For high-end camera Canon such as 5D mark III, 6D or 7D mark II , AF-ON button is available. To activate the back button focus technique fully, the things that you have to do is turn off the autofocus function in Shutter Button.  Follow this Steps : Enter to Menu >> Custom Function 2 >> Custom Control. Here you can change shutter button function  from metering  & AF start to metering Only.


For Canon camera with AF-ON button that doen’t exist, we can use the asterik (*)button or AE-L button to substitute AF-ON button. Follow the steps bellow:
1. Set the command option in one of  P/S/A/M , don’t use Auto in order to enter the Custom Control.
2. Press the menu button the use the main dial to choose Custom control, then choose option called “Shutter/AE Lock Button”. From here,  there’re many choices depend on camera, the thing you must remember is the numbers before the diagonal line show the shutter button, meanwhile the numbers after diagonal lines show the asterik (*) button or AE-Lock.
3. The point is you want to change the function combination  from Shutter/ AE-Lock become Metering Start/Meter + AF Start.

How to Use  back button focus in Nikon Digital SLR
In Nikon Digital SLR that is equipped by AF-ON button at the back, the way is pretty simple to activate the back button focus. Enter to menu ten Custom Setting Menu ( pencil icon) , then to autofocus part.Find the AF activation then choose AF-ON. Press OK  to activate. It make shutter button in camera only for take the photo, meanwhile the task to lock the focus dots is AF-On button function.

For Nikon DSLR camera without AF-ON button at back, we need to substitute  the function of AF-ON  with some button at back. Enter to Menu,then Custom Settings ,then Control. Choose the Assign AE-L/AF-L button then sliding down to AF-ON, then press OK. Now  AE-:/AF-L button which is exist at the back, the function  has already change become AF-ON until you can use the back button focusing.

How about the others camera? You can open the manual book of camera, if you cant find the term”back button focus” , you can find another name like autofocus lock.

Share
Tweet
Pin
Share
No komentar
Canon just Launched the newly flagship camera , Canon EOS 1DX Mark II. As the power of Canon, this camera have high specification and designed for Professional Photographer, especially for them who need speed, performance and  endurance of camera. The journalist photographers who shoot the sport activity and the other important events is the main consumer of thus camera. This camera also become the rival of Nikon D5.


Specification and Feature of Canon 1DX Mark II
Canon EOS 1DX Mark II is equipped with resolution 20,2 megapixels , it can shoot continuously for 14 frame per seconds (16 fps if you shoot in live view mode and it have ISO range from 100 until 51200 ( it can be forced until 409600). The Display size of Back LCD screen is 3.2 inches with 1,62 millions dots. This Autofocus system is the successor from the fist generation with 61  autofocus dots ( consist from 41 dots of  cross type  which is more accurate).

      This camera still stick with the body shape that is not so different from his brother Canon EOS-1DX ( first generation) that was launched 4 years ago.

     But this camera will more fast when it’s equipped with image processing DIGIC 6+. When you shoot continuously, this camera capable to save until 170 photos with RAW quality before slowing down. Two  Compact Flash Slots and ( one slot Cfast 2.0 – optional) which is available will guarantee you that you’ll never lost even just one photo because broken memory, because this camera can read one photo to two photo at once.

     About Video quality, This Full frame Digital SLR camera can record video with 4K on 60 framer per seconds with unlimited durations, but the format file exFAT limit the memory card only until 4 GB.


      Canon 1DX Mark II is equipped with skill to recognize the lens weakness which is paired with the camera. So that, camera will fix the weakness and defective of lens like Chromatic Aberration, distortion and diffraction that will be fixed in digital in camera, the things that we usually do in Lightroom or Photoshop.

        Another Nice Feature of this camera is GPS that designed in camera like Canon 6D. But unfortunately, we can get the wi-fi feature separately with pretty expensive price.

images source: digital camera world
Share
Tweet
Pin
Share
No komentar
Not all photos must be sharp and blurry photo is not always ugly. When we want to show how dynamic of a photo subject, we can make blurry deliberate to show the moving and subject speed. When we do panning shoot a motorcycle, people will know that motorcycle are moving.
There are three way to show the moving in a photo : Panning, use long exposure and zooming technique. Let’s start one by on :
1. Panning
Panning Technique is when we shoot while moving the camera following the subject direction. Subject that we follow will look so sharp , meanwhile the environment will looks blurry so will appear motion impression.
·         Set in Shutter priority mode of camera Set
·         How many seconds the exposure that we use , determined by subject speed, panning shoot on people who are joggng for example need 1/20seconds meanwhile car race can 1/100 seconds.
·         Anticipate the focus points then use manual focus.
·         How to move the lens , of course have to as soft as possible following the subject movement, and the direction is only horizontal, sos the panning photos still nice.
·         Don’t croping too much in camera, becaus ethe subject will truncated. Give the space for subject movement, crop in photoshop later.
·         Practice how to hold the key,sometimes  trial & error  is our bestfriend.
Beberapa contoh foto panning:
1/15 , f/13, ISO 400
1/100, f/7.1, ISO 400

1/25, f/13, ISO 200

1/60, f/20, ISO 100

1/160, f/5.6, ISO 200
2. Long Exposure
Long exposure photo is created when we shoot with slow shutter speed. Long Exposure need exposure time that usually fall in number 1/10 seconds or more slow.
When we shoot long exposure, we need solid tripod, remote shutter to avoid shake also need more times. The times that we need to repeatif we are not satisfied yet.
Long exposure isn’t only shoot in the night. Shoot the waterfall, sea or river in the daylight with the movemnt ( and movig clouds) become  looked like fiber cotton , they are also including long exposure. The point is , we need exposure times thatt so long, so that the moving object is looked blurry.

1/3 seconds, f/3.5 ISO 100

1/2,5 seconds, f/20, ISO 100

1/15 seconds, f/8, ISO 100
1/25 seconds, f/8/ ISO 100
3. Zoom Blur
The third way is try to do zoooming technique  with lens that show the subject movement. This technique only can do with zoom lens (more far with Zoom lens).
This is some examples of zoom blur photos :


1/50, f/4, ISO 100


1/13 , f/2.8 ISO 640

1/10, f/22 ISO 100


Share
Tweet
Pin
Share
No komentar
     Photogenic face is the face that seen beautiful and handsome in photo. All people have beautiful and handsome face ( not all, you know the point ) but the special thing on each people face often lost when they have to face in front of camera because nervous, awkward, don’t know the tricks and there many other reasons. Many people said that Photogenic is a natural characters, elegant in front of camera. But we can learn and copy from talented if we know the tricks .

     From Photographer side, shoot the face also need special skill. Portrait photographer have skill to value the people’s face that they want to shoot then shoot with technique, Angle, and lighting also need current make-up , so that it’s seen so beautiful and handsome.

     Even Thought you’re not portrait photographer , you will always come when we are asked to shoot the other people’s face and we can direct the model’s face that you want to shoot seen so beautiful and handsome in front of camera,isn’t more ugly better than the real face. To help you ( photographer nor the model) , this is 9 common tips in order to make the model’s face is seen so beautiful and handsome :

1. Avoid to Shoot the face from low Angle

Except you want to get current effect, avoid shoot the face from low angle. Place the lens parallel with eyes and little bit more high. 

2. Pay attention to Focal length and the length between lens and model’s face

The focal length of lens and the length between lens and the model’s face can influence how the face is seen in photograph.


For portrait photograph, the ideal focal length is between 70-150mm. That’s why prime lens with portrait specification usually have focal lengths 85mm, 90mm or 135mm. When we are forced to shoot with the wide lens , pay attention with able and length. Wide lens is easy caused distortion , so the nose will seen more big, to fix that bring the lens closer to the face until the distortion is looked minimum. 

3. Make Eyes more Attractive 

Top Models know about squinching, little bit squinching eyes in order to make eyes is seen more live and attractive. In other words, make the eyes more smiling. We all know that eyes is the soul window, when we smile our face overall will seen more attractive.

Look at three photos bellow , Squinching technique to make eyes more live on the right end . Looking so different, isn’t it?


4. Pay attention with Body Gesture

Shooting face with the body perpendicular looking the camera it was boring. Try this position, tilt the shoulder to camera direction around 30 degree. Beside it make your face looked so relax, fat people also can looked so slim.


5. Don’t smiling too long 

Smiling too long in front of camera can make the face become awkward, model’s smile is looked fake and forced. So that, smiling in lips spontaneity, before the photographer finger press the shutter button.

6. Strengthen the Chin Line. 

The pro Photographer, Peter Hurley teach models to bring their chin tend to front little bit. The purpose is in order to the chin line is looked more strong and solid , so that the face is looked so beautiful/handsome overall. 

7. Relax
To make photogenic face, a model or moreover an old man at the street have to relax when taking the picture. Try to melt the awkward situation with open the conversation about anything, you can start with the weather, foods, until Hobby. With chatting, object eyes will more live because we invite to think. A photographer have to more relax better than the model ( moreover they’re amateur models) to build the relax and enjoy atmosphere.

8. Pay attention with special Character of Current Face 

There are people who have big and wide ear better than the other, there are people who have acnes , there are people who have pug nose. For model that have special characters like that, any attention the simply tips to help them more excellent.

9. Pay Attention and Fix it

When taken photo as a model, pay attention the moment when photographer take exposure.Avoid the little mistakes that you don’t need like mouth open, the eyes glancing sideways, Closed eyes or face isn’t ready.The Photographer also direct to make model show their best pose depend on some techniques above. 

After some photos, look at the result together ( model and photographer). Discuss the deficiency that you want to fix openly. In this case, need the good communication skill and openly but still friendly become the key.


Share
Tweet
Pin
Share
No komentar
      Many people said, practice makes prefect, the exercise direct you to the perfection. Well, we are never  become perfect photographer, but become better and better photographer, it’s a must.

       Today i will explain about some exercise that easy relatively but make you become better and better photographer:

1. Practice using Spot Meter

       Metering System of Modern Camera is very sophisticated.  Metering system  that mostly to use is evaluative, matrix or multi-area that usually very good in low light condition. But when we have to face with the situation which is too bright or too dark or the other tricky situation. Metering system will not work as your want. 
That’s why we have to mastering about spot metering camera. More often we using spot meter, we will habitually knowing where we have to place the spot metering on current subject and lighting condition. We can know how to read color tone before set the photo composition. Read more about Metering here.

2. Practise using  Histogram
       All lights information on a photo can be looked through histogram quickly. Luckily you can shoot with Mirrorless camera which is equipped by electronic viewfinder, because this camera type can be set to display the histogram in viewfinder so we know photo histogram even before pressing the shutter.

    When we have to face the hard lighting condition, check the histogram on your photo result, Histogram level display the photo lighting, from the dark ( brightness = 0, in the left end)  until the brightest ( brightness = 255, the right end of histogram). The Top histogram show the number of pixels numbers with the brightness level and the high of top histogram show the numbers of pixels with information.It means : the very dark photo will show the graphic tend to left, meanwhile the bright photo tend to right.  Read more about histogram here. Also turn on the highlight warning in camera to avoid the detail of photo because overexposed. 

3. Use the Prime Lens Continuously

      Using Prime lens , lens non zoom that only have one focal length, it force us to make us more creative. If usually we just zoom-in or zoom out the lens, with the prime lens we have to walking approach or away to get right composition. Beside we have to pass thinking process an moving to set the composition when you use the prime lens, we also become memorize with character and view angle of lens, so in that current times, we feel so united with the lens perspective. Read more about Prime lens here.

4. Practice Using Manual Mode

     Even thought the aperture mode and Shutter priority are pretty good in most of photoshoot condition, but mastering the manual mode is one of sign of finesse photographer. 


  Beside you will know perfectly with the manual mode, the main function of practice using manual mode is to fix our hand speed to change the aperture-shutter speed and ISO parameter. Need practice to do this cycle quickly : hand do metering > eyes see the camera metering > hand change the aperture/shutter.

5. Commitment to upload photos everyday.
    Make commitment to upload photos everyday, even in facebook, twitter, flicker or instagram. So that, we will encouraged to keep looking for interesting photo subject and do experiment that you never thinking before. 
Have a nice practice.

Share
Tweet
Pin
Share
No komentar


        At this moment, all Digital SLR camera was equipped with some choices of camera autofocus mode. How to shoot the flower on the table is different with when you shoot the kids who’s playing football in the field. This explanation is about autofocus and not about manual focus.
        When you shoot motionless object, usually we use one focus point, lock the focus once and the start to shoot. But when you shoot moving object or people that love to move, we need camera that capable to move the focus point automatically follow the subject. The good news is The Digital SLR camera equipped with that feature. Let’s figure out one by one:

Area Autofocus Mode
        In Digital SLR camera , it was called “One Shot AF” Meanwhile in Digital SLR Nikon, it was called “Single Area AF”. From the name, it was clear that when we choose the one focus point,  then camera will find the Contrast in current area of focus point. When we half press the shutter button or press the AF-On button (if use Digital SLR  camera that have AF-On  button), camera will lock the focus area in that point just once. If subject are moving and even though we keep press the half press shutter button, camera won’t move the focus automatically.
        In this mode, we can’t full press before camera can lock the focus point. But this rule can be tricked through setting in autofocus menu and set the priority focus. 
Autofocus Continuous/AI Servo Mode
       This mode in Digital SLR camera Nikon named  “ Continuous/ AF-C” meanwhile in Canon named “Al Servo”. This mode is used when we have to follow a photo subject tat keep moving, for example when we shoot the sport activity, animal or car that is  moving.
.
       In this mode, camera will analyze the moving of the subject and predict where’s the direction of subject when moving,  with placing the focus dots little bit early from the subject location. With the continuous mode we can follow the moving subject and get the sharp focus. How to do it? Keep half pressing the shutter while peek the moving subject or keep pressing the AF-On button with thumb. ( if there’s exist)
Autofocus Hybrid  Mode/ Combination Between Single & Continuous
     In Canon Digital SLR was named “AI Focus” meanwhile in Nikon was named “AF-A”. This mode is the combination between the single and Continuous mode where camera change the focus from single to continuous or the reverse suitable with the condition of photo subject. If the object isn’t moving , camera will use single,meanwhile when the object i moving camera will change to Continuous mode.
Not all lens of this camera have this mode. For beginner, actually this mode is quite good  , because we don’t need to changes the focus mode for several times.
Which one the Autofocus that You Should use? 
  1. When you shoot motionless object or people who’s posing, you should use single mode. 
  2. When you shoot moving object  constantly, use the continuous mode. 
  3. For daily needs, you can leave the camera in default position of continuous or hybrid mode. But when the camera can’t lock the focus in the continuous mode, for example when we shoot in low light condition , change the single mode. 
  4. For beginner who that their hand’still not agile to change the focus mode quickly, you can use the hybrid mode ( if there’e is exist in your camera).
How to Change the Focus Mode
       The way to change the focus mode isn’t same from each camera. That’s way , i suggest to check manually. In Camera Nikon D300S/D700, you can find he little hook in the front left part of lens mount : AF-S, AF-C and M (manual). Meanwhile in canon ( for example EOS 60D), you can change the focus mode with press the AF button in the top of camera , then will appear the focus mode options in the top LCD panel

Share
Tweet
Pin
Share
No komentar
Newer Posts
Older Posts

About me

POPULAR

  • The Best Mirrorless Camera 2016
           We start from how the mirrorless camera was born. Mirrorless Camera is the camera type that start trending at this time and  it’s pr...
  • Magical Sunset and Sunrise Photographs Tips
          Do you ever hear “ Nature is Painting For Us” ? We can see wonderful painting everyday through your own eyes without have going to Ph...
  • Holding Digital SLR Camera Techniques Like a Pro
         There are many basic things and simple but precisely you don’t know properly because you think that it’s simple to learn and it doesn’...
  • Simply ISO Concept
           The definition of ISO is the size of level of sensitivity of camera censor toward light. More high the ISO setting , more sensitive ...
  • Digital Camera Lenses
       Most of beginner photograher oftenly still confuse when they want   to choose lens which is suitable with what they really need.   Despi...

Labels

Contest Lens New Camera News Photographers Tips Travel Stories

recent posts

Blog Archive

  • ►  2018 (1)
    • ►  March (1)
  • ►  2017 (8)
    • ►  June (3)
    • ►  April (5)
  • ▼  2016 (88)
    • ►  October (1)
    • ►  September (13)
    • ►  August (8)
    • ►  May (1)
    • ►  April (15)
    • ▼  March (50)
      • 6 Composition Techniques of Photography
      • Back Button Focus Technique in Digital SLR Camera
      • Canon 1DX Mark II, Full Frame Digital SLR Camera W...
      • 3 Creative Techniques to Shoot the Moving Object
      • 9 Photography Tips to Shoot Photogenic Face
      • Be Better Photographer, do this 5 Exercises
      • Understanding Digital SLR Camera AutoFocus
      • 20 Photography Tips to Sharpen Photo
      • 5 Considerations Before You Buy Camera Lens
      • 100 Quick Photography Tips for Beginner
      • How To Make Wonderful Bokeh in Photograph
      • Good news, Nik Collection is totally FREE!
      • Sony A6300, The Fastest Auto Focus In The World
      • How to Change Background on Macro Photo
      • 6 Shutter Speed Techniques on Landscape Photography
      • Canon EOS 80D The Successor of Canon EOs 70D - New...
      • 5 Camera Settings That have to Check before you Shoot
      • Zoom Or Prime Lens?
      • Magical Sunset and Sunrise Photographs Tips
      • The Best Mirrorless Camera 2016
      • The Best Mobile Phone Photography Techniques
      • The Power Of Prime Lens 50mm
      • Prime Lens and the Amazing Advantages
      • How to Use Depth Of Field Button Preview of DSLR C...
      • The Half Press Shutter Button for Beginner Photog...
      • Holding Digital SLR Camera Techniques Like a Pro
      • Focal Lenght of Digital Camera Lens
      • Digital Camera Lenses
      • Understanding EXIF Data
      • White Balance , For What?
      • Exposure Compensation and How to Set It
      • Histogram Concept in Photography and How to Read It
      • Motion Freeze Using Priority Shutter
      • Exposure Modes on DSLR and Mirrorless Camera
      • Digital Camera modes - Program Mode
      • New Digital Camera - 8 Great Recomendations Setting
      • Exposure Triangle and Stop in Photography
      • Aperture and Depth of Field
      • Shutter Speed Concept, Make it Sharp or Blurred
      • Simply ISO Concept
      • The Exposure Triangle
      • Metering Modes
      • Budi Luhur dalam Lensa Kamera 2016 (Deadline: 25 M...
      • Rule of Third Composition Techniques
      • The Monster Sony Alpha 7R ii
      • Photo Composition Techiques
      • The Magnificent Caving and Cave Exploration Photog...
      • Annie Leibovits
      • Ansel Adams (1902-1984)
      • Henri cartier-Bresson (1908-2004)
FOLLOW ME @ytrihatma

Distributed By Protemplateslab & Created with by BeautyTemplates